Showing posts with label Cheap Finds. Show all posts

Thursday, August 23, 2012

Baptism Luncheon Decor

Thank you to everyone who is visiting from Pinterest!  I haven't posted to Crafty Kate in quite a while.  Please visit me over at https://twitchetts.blogspot.com


Want to know how I made the streamer, cupcake stand, and flower clip from Tuesday's baptism luncheon food table?  Well, you’re in luck!

Now, none of these projects are hard.  In fact, you can probably figure them all out on your own.  But I’m going to share anyways.  I’m just that helpful!

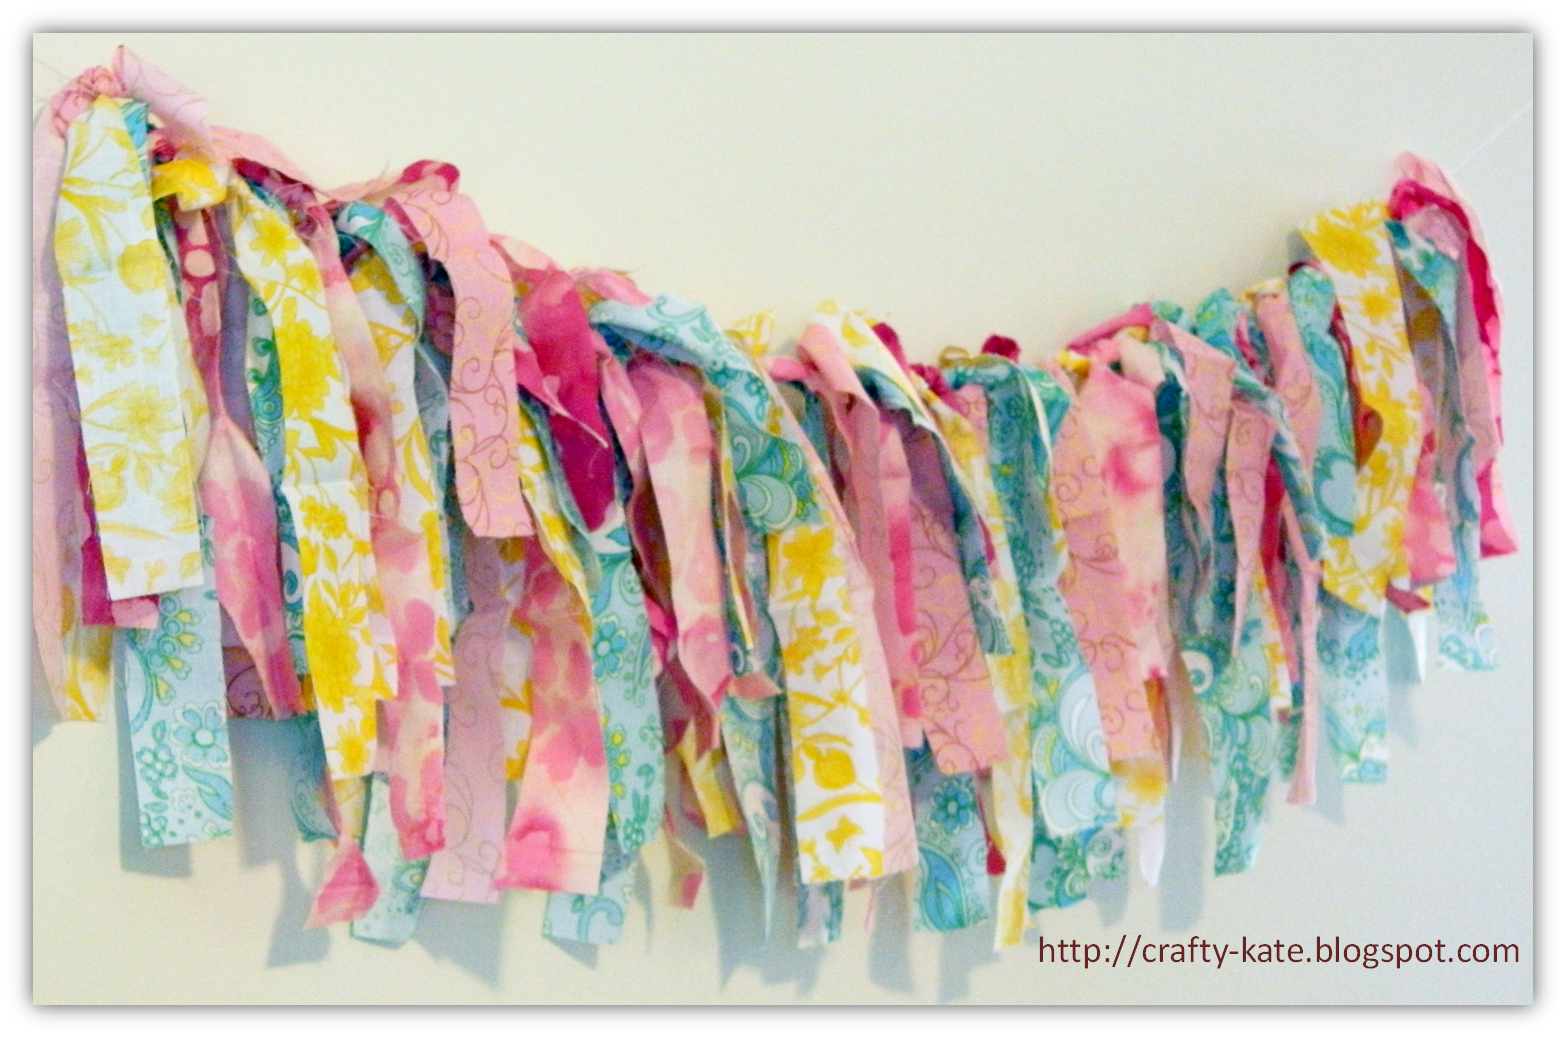
For the streamers, I bought fabric squares and cut them into strips.


Then I tied the strips around a piece of string.


Done.  Yep, that was it!  My biggest tip, make sure you buy enough fabric.  I wanted the streamer to stretch across the length of the table, so I should have bought twice as much fabric.  Lesson learned.
The cupcake stand was made from hard Square Plastic Plates and a couple candle holders from Hobby Lobby.


I just used a bead of glue around the top of the candle holder and attached it to the bottom of the plate.  I didn’t attach the levels together.  This makes them easier to store, and also makes it so I have stand alone cake stands!
The flower in the middle of the table was just three flowers wrapped around a clothes pin.  I just wanted something quick and easy.  It wasn’t something that needed to last forever, just for the length of the lunch.  I probably should have shortened the stems first, so I didn’t have to twist them so much.


Tuesday, August 21, 2012

Baptism Luncheon Food Table

Thank you to everyone who is visiting from Pinterest!  I haven't posted to Crafty Kate in quite a while.  Please visit me over at https://twitchetts.blogspot.com


I was so excited to do a fun food table for Little Miss’s baptism.  It was the first time I could do something “girlie”.  Of course I spent a month cruising Pinterest for ideas.  I must admit, I love the way it turned out!

I knew that planning a luncheon with a newborn would be challenging, so I kept the food simple.  Build your own sandwiches with potato salad, pasta salad, and melons.


I got a little fancier with the drinks.  (Or at least I made them look fancier)  They were just strawberry Kool-Aide with kiwi slices and lemonade with strawberries slices.  Both tasted delicious.
I found a couple of easy and yummy dessert recipes on pinterest.  The cookies are from Cherished Bliss and the cupcakes are from Polish the Stars.
Both desserts were huge hits! 
A special shout out to my sister-in-law who whipped up a delicious frosting, completely last minute!
The vases were empty Frappuccino bottles and a mason jar filled with flowers from Dollar Tree. 
The streamer was a fun project that I’ll post more about later this week.
The cupcake stand was a project that I whipped up.  It was super easy, but I'll share more on that later this week too.
The whole table came together really well.
Why can't sandwhich condiments be prettier colors?!? 
But I must admit, since I’m a procrastinator, I had lots of help getting everything set up.  And it was all done with a house full of hungry family.  So I have to thank everyone that helped.
It was a fun luncheon to celebrate such an important day in Little Miss’s young life!

Monday, August 20, 2012

A Few of My Favorite Things


I’m back!  I hope I didn’t lose anyone, but I’ve been busy working on the greatest thing I’ve ever made.
I call her Little Miss.
She took nine months to complete and is worth every sleepless night and swollen finger.

When I started this blog, I made the decision to keep my family life private.  So I won’t be using her name or putting her face on my blog. 

While I was prego, I realized that the baby market is crazy!  They have a gizmo or product for about every situation.  Some of these products probably aren’t worth the extra money.  But here are a few items that, over the past few weeks, I have decided are worth every penny. 

Munchkin Disposable Changing Pads

 These little bad boys have saved my cute changing table cover about a million times, not to mention they make great covers for those nasty public changing tables and the quick diaper change on someone’s living room floor.  They are a little large, so I cut them in half, giving me twice as many in each pack.

Bright Starts Lots of Links

Using these links, I have been able to transform anything into a hanging toy.  Little Miss is automatically happy when she sees something interesting hanging over her head.  Obviously, you don’t want to hang anything dangerous over a baby’s head, but seeing her favorite toy has kept her happy on multiple shopping trips.


Bright Starts Comfort and Harmony Portable Swing

Little Miss loves relaxing in her swing.  I’ve even finagled ours, with the above links, to hang some bright colored toys.  These toys keep her occupied for minutes! (This is like hours in newborn talk).

I’ve been working on several projects over the past few weeks; hopefully, I will be able to go back to posting on a fairly regular basis.  But if there is one thing I have learned, newborns do not know the meaning of sticking to a schedule.  So bare with me as I start this new chapter in the life of Crafty Kate.


Linky Party!
The Gunny Sack
Skip to my Lou
The Blackberry Vine

Tuesday, May 29, 2012

Crib Wall

I’ve been brainstorming what kind of decoration I want to put over the crib for a while.  I kept coming back to the 3D paper art that people have been doing lately.  Problem was everything I found was girlie…and mostly butterflies.  This is cute, but since we don’t know if Baby is a boy or a girl, butterflies didn’t seem like the right approach. 

Sunday morning, when I was debating if I should roll out of bed or snooze for a bit longer, the idea hit me…Stars!
I had seen several of these 3D stars around Christmas.  And when I went to Pinterest for a quick tutorial, I found this from Little Birdie Secrets.

I’m so happy that I decided to go back to Hobby Lobby and get that paper book for the Alphabet Wall, because I just used more sheets from the same book to create the stars.
I even got to use my Silhouette, because I finally got a new Silhouette Blade!
The trickiest part was figuring out how to attach them to the wall.  I ended up using big loops of tape on the backsides.  Super simple.

The project didn’t take long at all.  The most time consuming part was scoring the stars so that they folded easily. 
I even have a few extra stars that I might hang randomly in the room to pull it together.


Linky Party!!!

Monday, May 21, 2012

Nursery Alphabet

Well, it’s finally up.  The alphabet project that would never end…

At least it looks good!  Not perfect, I won’t point out any of the flaws…I’m sure you can find them.  But I’m happy with the results.

You may remember that I started this project a few weeks back.

I was originally picturing the big letters that are all over pinterest.  But I couldn’t commit to the price per letter.  So I wandered around Hobby Lobby for another route.  I decided to use two sets of plain chipboard letters.  (because one set just didn't seem thick enough)  They were 4.99 a set and I had Hubby with me so that we could each use a 40% off coupon.  So the letters ended up costing me about $6.00.

After I glued the two chipboard sets together, I painted the tops and edges.  Half of the letters were painted in an off white and half in a very dark brown.  Then I used Mod Podge to apply the paper to the chipboard.


To hang the letters I used some 3M poster strips that were cut in half length wise.
This was my very high tech way of marking the center of the bookshelf.
I started at the bottom and worked my way up.  As I put the letters up I noticed a pattern to the paper.  This was unintentional.
Also, I decided on the messy/whimsical as opposed to the straight line, because it’s more forgiving of errors.

I have to end this by saying I couldn’t have done it without my friend, who was visiting from out of town.  Without her help, my pregnant brain would have messed up the alphabet…several times.


Linky Party!!
Skip to My Lou
Keeping it Simple
Craft-O-Maniac
C.R.A.F.T.
I'm Topsy Turvy
I Should Be Mopping the Floors
Katie's Nesting Spot
52 Mantels
Show & Share
Sugar & Dots
French Country Cottage

Thursday, May 10, 2012

Homemade Gift Giving


I’ve been trying my hand at homemade gift giving, and it seems like my go to idea is picture frames.  I’ve become a little obsessed with taking a thrift store find and turning it into something personal.

I used some fun scrapbook embellishments for the letters.

This one is just a block of wood that Hubby cut for me.  I painted it and sanded the edges, then I attached a piece of wrapped cardboard and a decorated clothes pin.
Please ignore the bad picture here...I had a house full of people and wanted to get the sucker wrapped...

I got the inspiration from Pinterest.
source

And don’t forget the custom frame I posted a little while back for my Sister-In-Law.

I’m loving being able to give homemade gifts! 


Wednesday, May 2, 2012

Cheap and Easy


The other day, I was browsing Pinterest and came across a tutorial for mounting pictures to tiles.  I immediately thought of the living room wall project and had to try it.

I must say, I like the way it turned out.  And it was SUPER easy and cost all of $0.13.  My type of project!
The tutorial was from Crunchy Betty.  I didn’t put any Mod Podge on the top, because I didn’t want to smear the ink, but I still think it turned out really cute.

I used a picture that I had taken a while back.

It’s a view from above of the angel we have in our yard.  There’s just something about her that makes me smile.

Next step is to hang this puppy on the wall.  First I need a Hubby approved method of hanging.  He’s worried that it will fall off the wall and hurt the hardwood floors.


Linky Party!
Sugar and Dots
Southern Lovely
Katie's Nesting Spot