Showing posts with label Tutorial. Show all posts

Thursday, August 23, 2012

Baptism Luncheon Decor

Thank you to everyone who is visiting from Pinterest!  I haven't posted to Crafty Kate in quite a while.  Please visit me over at https://twitchetts.blogspot.com


Want to know how I made the streamer, cupcake stand, and flower clip from Tuesday's baptism luncheon food table?  Well, you’re in luck!

Now, none of these projects are hard.  In fact, you can probably figure them all out on your own.  But I’m going to share anyways.  I’m just that helpful!

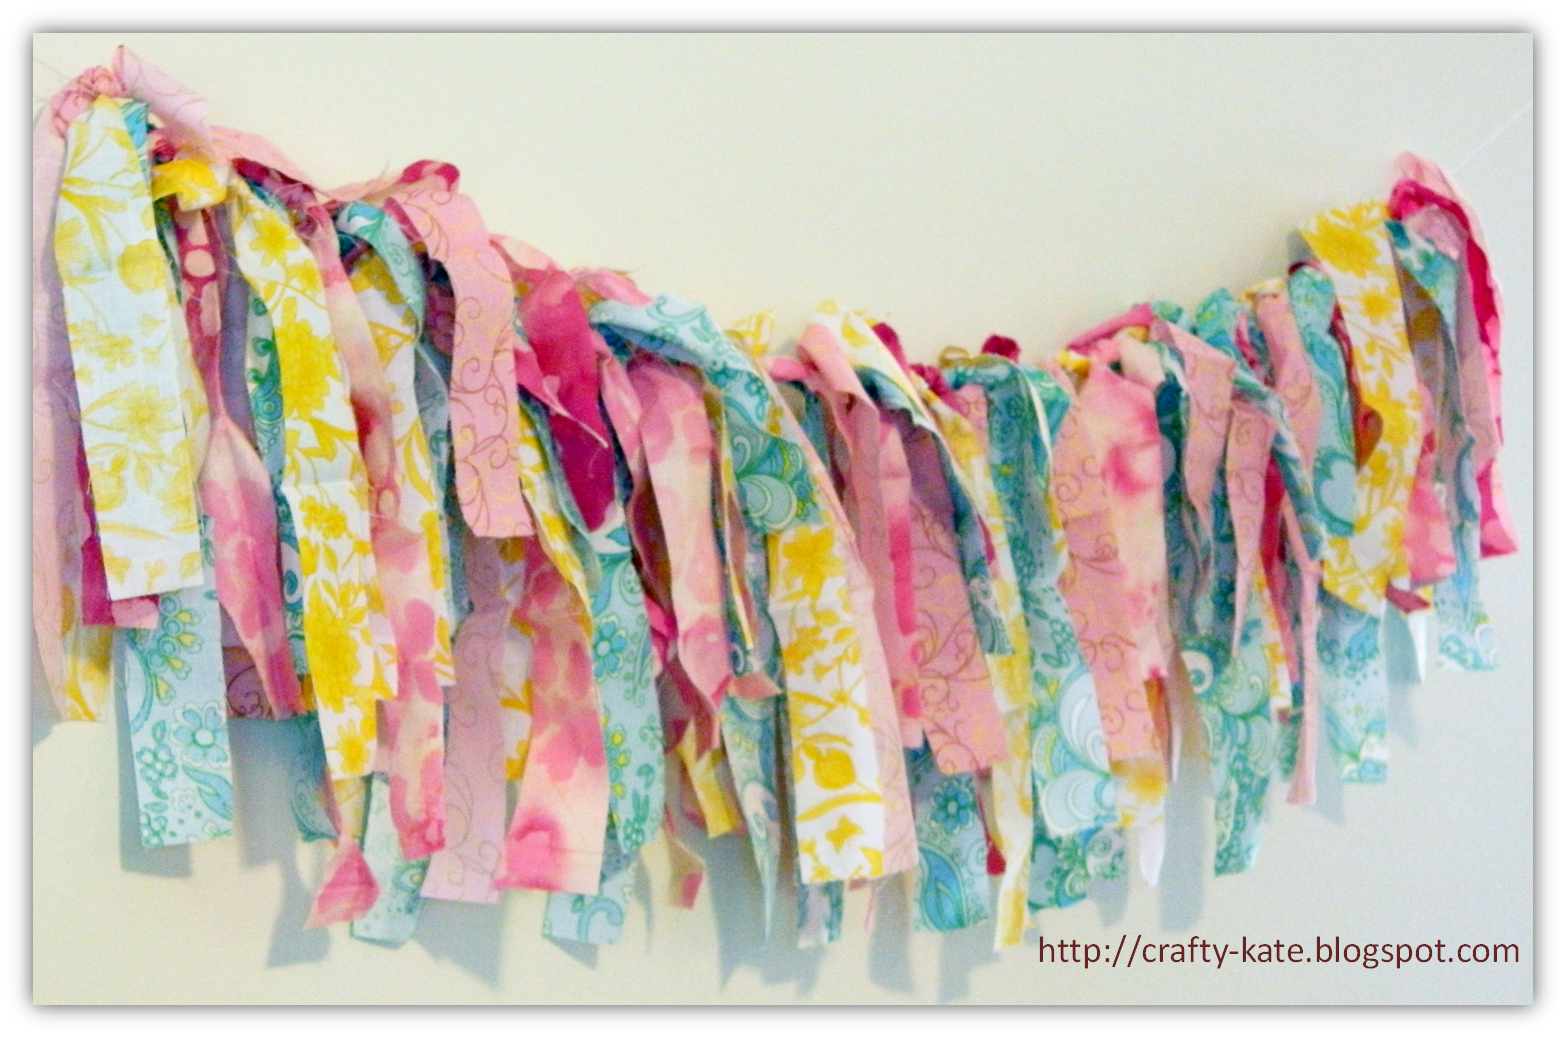
For the streamers, I bought fabric squares and cut them into strips.


Then I tied the strips around a piece of string.


Done.  Yep, that was it!  My biggest tip, make sure you buy enough fabric.  I wanted the streamer to stretch across the length of the table, so I should have bought twice as much fabric.  Lesson learned.
The cupcake stand was made from hard Square Plastic Plates and a couple candle holders from Hobby Lobby.


I just used a bead of glue around the top of the candle holder and attached it to the bottom of the plate.  I didn’t attach the levels together.  This makes them easier to store, and also makes it so I have stand alone cake stands!
The flower in the middle of the table was just three flowers wrapped around a clothes pin.  I just wanted something quick and easy.  It wasn’t something that needed to last forever, just for the length of the lunch.  I probably should have shortened the stems first, so I didn’t have to twist them so much.


Monday, May 21, 2012

Nursery Alphabet

Well, it’s finally up.  The alphabet project that would never end…

At least it looks good!  Not perfect, I won’t point out any of the flaws…I’m sure you can find them.  But I’m happy with the results.

You may remember that I started this project a few weeks back.

I was originally picturing the big letters that are all over pinterest.  But I couldn’t commit to the price per letter.  So I wandered around Hobby Lobby for another route.  I decided to use two sets of plain chipboard letters.  (because one set just didn't seem thick enough)  They were 4.99 a set and I had Hubby with me so that we could each use a 40% off coupon.  So the letters ended up costing me about $6.00.

After I glued the two chipboard sets together, I painted the tops and edges.  Half of the letters were painted in an off white and half in a very dark brown.  Then I used Mod Podge to apply the paper to the chipboard.


To hang the letters I used some 3M poster strips that were cut in half length wise.
This was my very high tech way of marking the center of the bookshelf.
I started at the bottom and worked my way up.  As I put the letters up I noticed a pattern to the paper.  This was unintentional.
Also, I decided on the messy/whimsical as opposed to the straight line, because it’s more forgiving of errors.

I have to end this by saying I couldn’t have done it without my friend, who was visiting from out of town.  Without her help, my pregnant brain would have messed up the alphabet…several times.


Linky Party!!
Skip to My Lou
Keeping it Simple
Craft-O-Maniac
C.R.A.F.T.
I'm Topsy Turvy
I Should Be Mopping the Floors
Katie's Nesting Spot
52 Mantels
Show & Share
Sugar & Dots
French Country Cottage

Tuesday, March 13, 2012

Mobile Tutorial

I honestly can’t believe its March!  I had to drag the laptop out onto the porch, because there is NO way I’m missing this beautiful weather to type up a post.


As promised, I’m giving you the step by steps of how I made the mobile for Baby’s nursery.

I started out with some simple supplies.
Yarn, Styrofoam Balls, Glue, and String

Start by tying a piece of string around the Styrofoam ball.  Be sure to leave a nice long tail on the string.


Apply a coat of glue at the top of the ball.
Start wrapping the yarn around the tail of the string.


Keep wrapping the yarn around the ball.  Make sure to press down on the yarn so that it stays tightly wound and pressed against the ball.
Continue to add glue and wrap the yarn.
 I found that a cut piece of an empty toilet paper roll worked great as a stand for the ball.  It’s pretty frustrating when the half glue covered ball wants to roll around on your workbench.

When you get to the end, cut the yarn and press it into the glue.  I applied a small dab of glue to the end, just to be on the safe side.
Once you finish one ball, make some more.
Next take the inner portion of an embroidery hoop and tie the tail of each ball around it.
Then, cut three long pieces of string and tie them to the hoop.  These will be used to hang the mobile from the ceiling.
Wrap some yarn around the hoop.
Finally, hang the mobile from the ceiling and enjoy!


Tuesday, March 6, 2012

Flower Frames

I’ve had a project on my to-do list for a while, and I finally got to over the weekend.

I found the idea on pinterest. (Where else…)  But I couldn’t find the where the picture originally came from.


I dug theses 3 matching picture frames out of a pile at our local Red Tag Thrift store.  They were only $0.79 each!
I want to refinish the frames, but that will have to wait until after the baby comes.  I did give them a good cleaning with some white vinegar and water.

I found these vases at Michael’s for just $0.99 each!
I took some 18 gauge wire and wrapped it around the top of the vase.


Then, I stapled the wire to the frame on either side. 
Make sure they line up before you staple them…I learned that the hard way and had to redo the second one because the vase hung a lot lower than the first one.  Oops!
I twisted the ends of the wire into a simple knot, just for a little added security.
Finally, I added some flowers that I had on hand.
My plan is to swap out the flowers with the seasons.

Thursday, February 23, 2012

Oscar Party Wine Charms

This Sunday is my annual Oscar party.

This year, I wanted to update the decorations.  I’ve been using the same cheap decorations for the past couple years and I thought I would give this year’s party a craftier feel.


First up, some Oscar party wine charms.

This is the second time I’ve made wine charms like this, and I love the way they turn out.

I start with some inexpensive jewelry parts.  Bought at 50% off at Hobby Lobby, they only cost me $1.97!
Trace the jewelry plate onto the paper of your choice and cut out.
Mod Podge the paper to the jewelry plate and allow to dry. 

Follow that with another coat of Mod Podge.

Next, apply a thick coat of Inkssentials Glossy Accents Epoxy.
I love this stuff!

I placed a scrapbook embellishment right onto the wet epoxy.


The epoxy will take a while to dry.  These dried overnight, and a couple of them aren’t quite dry yet.

 Finally, insert the ear wire into the jewelry plate and around the stem of your glass.

I'm thinking this will help make sure the pregnant ladies don't get their drink mixed up with the
"fun" drinks.